LoRa Device ( B-L072Z-LRWAN1 + X-NUCLEO-IKS01A2 )


Hello , In our Previous Articles Entitled " How To Connect Your First LoRa Gateway " We Built our First LoRa Gateway and Today we Will Connect Our first LoRa Device To our Gateway Step by Step.
Link to Our Previous Article : Link
** Let's Start our Project **
Today i will show you guys How to Setup , Build and Connect Your first Device step by step .
First of all we need to buy some component for our Project so :
Hardware needed :
First of all we need to buy some component for our Project so :
Hardware needed :
- B-L072Z-LRWAN1 Board From STMicroelectronics

- X-NUCLEO-IKS01A2 From STMicroelectronics

- Our LoRa Gateway


Software needed :
- IAR Embedded Workbench

- STM32 ST-LINK utility

Link To Download it : Link
- LoRaWAN software expansion for STM32Cube


Link To Download it : Link

First of all , Let's Talk about The Features of Each Board :
- B-L072Z-LRWAN1 :
This Board contain an STM32L072CZ Microcontroller , This Microcontroller Belongs to the category Of LOW Power ( LP : Low Power ) and 32 MHz max CPU frequency . Also Our Board Contain an SX1276 Transceiver . The transceiver features the LoRa long-range modem, providing ultra-long-range spread spectrum communication and high interference immunity, minimizing current consumption . Our Board is Based on :
The CMWX1ZZABZ-091 LoRa/Sigfox™ module (Murata) :

- - 860-930MHz LPWA Module
- - Chipset: Semtech (SX1276) + STM (STM32L)
- - Modulation: FSK, OOK and LoRa Modulation
- - Small form factor LoRaWAN module
- - MCU Chipset: STM32L0 Series
- - CPU: ARM Cortex-M0+
- - Peripheral Interfaces: I2C, UART, USB, SPI
- - Pre-certified radio regulatory approvals: 868 & 915 MHz spectrum

Finally , This Board is amazing , it can Be Connect Like a Sigfox Device or Like a LoRa Device.
* All The Technical Documentation you can Check it Here : Link *
- X-NUCLEO-IKS01A2 :
The X-NUCLEO-IKS01A2 is a motion MEMS and environmental sensor evaluation board system :

- LSM6DSL:
MEMS 3D accelerometer (±2/±4/±8/±16 g) + 3D gyroscope (±125/±245/±500/±1000/±2000 dps)
- LSM303AGR:
MEMS 3D magnetometer (±50 gauss) + MEMS 3D accelerometer (±2/±4/±8/±16 g)
- LPS22HB:
MEMS pressure sensor, 260-1260 hPa absolute digital output barometer
- HTS221:
Capacitive digital relative humidity and temperature
- DIL 24-pin:
Socket available for additional MEMS adapters and other sensors (UV index)
Our LoRaWAN Device Support Three Type of Class :

- Class A ( Bi-Directional End Devices ) :
- End-devices of Class A allow for bi-directional communications whereby each end-device's uplink transmission is followed by two short downlink receive windows.

- In addition to the Class A random receive windows, Class B devices open extra receive windows at scheduled times.

PNG : Ping Slots
BCN : Beacon ( Beacon Period )
What's Beacon ?
In Class B, the gateway broadcasts a periodic beacon every 128s . the beacon transmission is protected by a reserved period Called Beacon Period and it took 5.12s .
*) This is An Exemple for the Beacon ( BCN ) :

What's Ping Slots ?
Between two beacons, each end-device opens N reception slots called ping slots .
What's Ping Period ?
The ping period is the delay between two ping slots, and is constant. The offset between the beacon
and the first ping slot is pseudo-randomly chosen after each beacon by each end-device .
In The Link Bellow , You Can Check and See More Information About The Beacon Period ( BCN ) and Ping Slots ( PNG ) and Also More information About LoRaWAN Class B .
- Class C ( Bi-Directional End-Devices with maximum receive slots ) :
- End-devices of Class C have nearly continuously open receive windows, only closed when transmitting.

Diagram Explanatory for the three class of LoRaWAN

LoRaWAN Class A :
Advantages :
- Lowest power consumption = longest battery life
Disadvantages :
- Long latency
Example :
- Battery powered sensors
LoRaWAN Class B :
Advantages :
- Deterministic latency
Disadvantages :
- Higher power consumption
Example :
- Battery powered actuator end-device
LoRaWAN Class C :
Advantages :
- Lowest receive latency
- End-device has continuous receive window
Disadvantages :
- Highest power consumption (expect end-device to be mains powered)
Example :
- Mains power low-latency actuator end-device
Now, You Know which Class of LoRaWAN will be used , We will Just Send The Values of Our Sensors Motion and Battery Level From our Device To The Gateway. So ....... Yes is the Class A .
LoRa Architecture

Steps :
1) Creating Your device on The Things Network :
- Go To https://www.thethingsnetwork.org and Login to Your Account .
- Go To Console .

- Click on Applications .

- Access your application on The Things Network .

- Select Devices and click Register Device .

- Create Your Device ID to indentify your device on the network. On Device EUI, click on random button to generate it, then click Register.

- Our device was created on the network . The Activation Method is OTAA by default, We will click on Settings to change it.

- Select the Activation Method ABP and disable Frame Counter Checks The Device Address, Network Session Key and App Session Key will be generated Automatically. Click Save.

What's OTAA Method ?


What's ABP Method ?

Difference Between OTAA and ABP ?

2) Configuring B-L072Z-LRWAN1 Development Board :
- Go To The File That you Downloaded Named ( I-CUBE-LRWAN ) and Extract it .
- We Need This Project Example ( End_Node ) Follow my steps :
1- Click on STM32CubeExpansion_LRWAN_V1.2.1 ( The Extracted Folder )

File Location ( Path ) :


The Exact Location ( Path ) :
C:\The_Location_Of_I_CUBE_LRWAN_Folder\STM32CubeExpansion_LRWAN_V1.2.1\Projects\B-L072Z-LRWAN1\Applications\LoRa\End_Node\EWARM
- Open IAR Embedded Workbench
- Click On Project Then Click on Add Existing Project

- Choose Lora.ewp
C:\The_Location_Of_I_CUBE_LRWAN_Folder\STM32CubeExpansion_LRWAN_V1.2.1\Projects\B-L072Z-LRWAN1\Applications\LoRa\End_Node\EWARM
- Open IAR Embedded Workbench
- Click On Project Then Click on Add Existing Project

- Choose Lora.ewp


- Now , Right Click on " LoRa - mlm32l07x01 "


Add the define "X_NUCLEO_IKS01A2" on Defined Symbols Then Click on OK
Or Copy and Paste :
STM32L072xx
USE_B_L072Z_LRWAN1
USE_HAL_DRIVER
REGION_EU868
X_NUCLEO_IKS01A2
- Now , We will Make Some Change . Go To : Projects\End_Node\main.c\Commissioning.h.
In The Commissioning.h File :
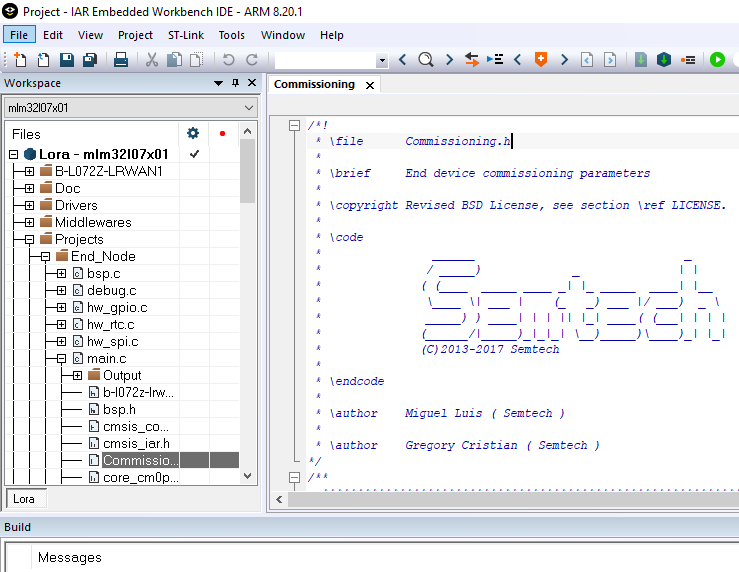
- Do Ctrl + f For Fast Search
Changes in Commissioning.h File :
1- #define OVER_THE_AIR_ACTIVATION 0
2- #define STATIC_DEVICE_EUI 1
3- #define STATIC_DEVICE_ADDRESS 1


- Open the "Device Overview" of your device on the Things Network. Use the information to change lines as the following images .

Changes The Informations in Red Box with Your Informations Fron TheThingsNetwork :
- LORAWAN_DEVICE_EUI ------------ with ----------- ( LoRaWAN Device EUI )
- LORAWAN_JOIN_EUI ------------ with ----------- ( LoRaWAN Application EUI )
- LORAWAN_APP_KEY ------------ with ----------- ( LoRaWAN App Session Key )
- LORAWAN_DEVICE_EUI ------------ with ----------- ( LoRaWAN Device EUI )
- LORAWAN_JOIN_EUI ------------ with ----------- ( LoRaWAN Application EUI )
- LORAWAN_APP_KEY ------------ with ----------- ( LoRaWAN App Session Key )

- LORAWAN_DEVICE_ADDRESS ------------ with ----------- ( LoRaWAN Device Adress )
- LORAWAN_F_NWK_S_INT_KEY ------------ with ----------- ( Network Session Key )
- LORAWAN_S_NWK_S_INT_KEY ------------ with ----------- ( Network Session Key )
- LORAWAN_NWK_S_ENC_KEY ------------ with ----------- ( Network Session Key )

- LORAWAN_APP_S_KEY ------------ with ----------- ( LoRaWAN App Session Key )


Attention !
Choose Hex Format For :
- LoRaWAN Device EUI
- LoRaWAN Application EUI
- LoRaWAN App Session Key
- Network Session Key
Follow images :


We Completed our Modification in This File ( Commissioning.h ) . So We Save our Modification .
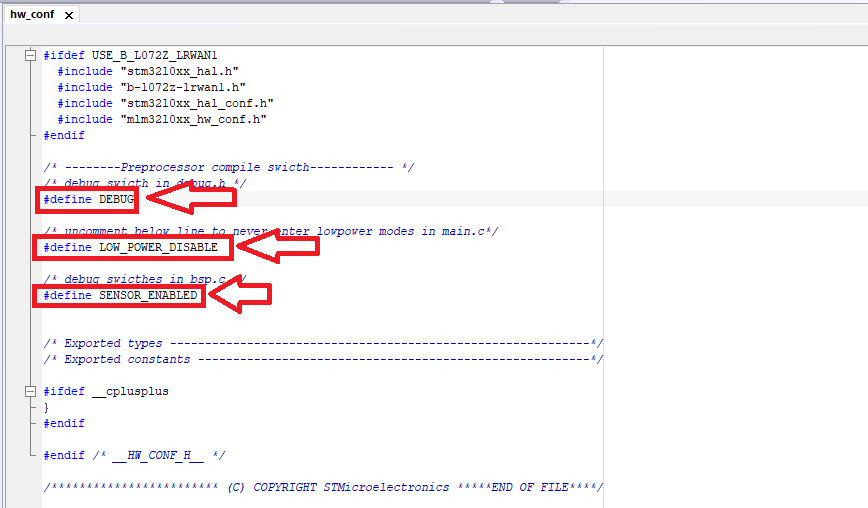
- Next we Have Some Modification in An other File . This File Named ( hw_conf.h ) Go To : Projects\End_Node\main.c\hw_conf.h .(See The Picture Below)


Remove the comments from :
- #define DEBUG
- #define LOW_POWER_DISABLE
- #define SENSOR_ENABLED

- #define DEBUG
- #define LOW_POWER_DISABLE
- #define SENSOR_ENABLED
We Completed our Modification in This File ( hw_conf.h ) . So We Save our Modification
- Now we will Save All , Build and Download our Code .


My Results :


3) Make a Decoder for Your Payload Format :
- You must be receiving a hexadecimal payload on The Things Network. So , Now We Will Simplify The Understanding of This Data Let's Begin .
Copy and Paste The Code Below in The Payload Formats :
function Decoder(bytes, port) {
// Decode an uplink message from a buffer
// (array) of bytes to an object of fields.
var decoded = {};
// Decode bytes to int
var batteryInt = bytes[7]
var humidityInt = (bytes[5] << 8) | bytes[6];
var pressureInt = (bytes[1] << 8) | bytes[2];
var temperatureInt = (bytes[3] << 8) | bytes[4];
// Decode int to float
decoded.battery = (batteryInt*100)/254 // Battery in %
decoded.humidity = humidityInt / 10; // Humidity in %
decoded.pressure = pressureInt / 10; // Pressue in hPa
decoded.temperature = temperatureInt / 100; // Temperature in °C
return decoded;
}

Data Received :


