Gateway LoRa ( IC880A+Raspberry pi )
Our Project is Based on IOT ( internet of things ).

Hello , My Name is Bassem Abdelaziz I study Applied License in Computer Technology and Telecommunication with Electronics and Telecommunication Speciality In Higher Institute of Computer Science and Mathematics of Monastir ( ISIMM ).
I'm Very Addicted To All Technology Especially :( Electronics , Embedded Systems , Robotics , IoT , C Programming , ... )
Today i will show you guys How to Setup , Build and Connect Your first Gateway step by step
What is IOT ? :
The Internet of Things is a set of sensors and actuators connected to each other through devices that Extract and send data to the cloud via Gateway and through these data these sensors and these actuators can interact with each other or else it can store these data only.

LoRa is the physical layer or the wireless modulation utilized to create the long range communication link. Many legacy wireless systems use frequency shifting keying (FSK) modulation as the physical layer because it is a very efficient modulation for achieving low power. LoRa is based on chirp spread spectrum modulation, which maintains the same low power characteristics as FSK modulation but significantly increases the communication range. Chirp spread spectrum has been used in military and space communication for decades due to the long communication distances that can be achieved and robustness to interference, but LoRa is the first low cost implementation for commercial usage.
What is LoRaWAN ? :
LoRaWAN defines the communication protocol and system architecture for the network while the LoRa physical layer enables the long-range communication link. The protocol and network architecture have the most influence in determining the battery lifetime of a node, the network capacity, the quality of service, the security, and the variety of applications served by the network.

When and why we choose LoRa Technology ? :
- When we need to Cover a specific and Big area without using internet connection Because LoRa can Cover Long Distance up to 25 Km ( we need just an internet connection Between the Concentrator and Cloud But the Communication Between The Device and The Concentrator is RF ( Radio Frequency ) ) so it's an important Range.
- When we will just send some Data ( reduced size ) just some information Like ( Values of Temperature Sensor , Humidity Sensor .... ) .
- Each message can reach 242 bytes.
- With LoRa Gateway you can connect thousands of Device.
- LoRa support Low Power Mode ( Long battery life ).
- Point of view price LoRa is not expensive.
- If You need to stock your Data so LoRa is the Right choice ( Data Storage (Database in TTN) ).
- Exchange data in Real time without any collisions
- Secure Data and free Cloud Hosting....
LoRa Architecture

** Let's Start our Project **
First of all we need to buy some component for our Project so :
Hardware needed :
- Raspberry pi
- SD Card For Raspberry's ISO image ( To Setup our Operating System ( Raspbian ) )
- Raspberry's Charger ( minimum 2A )
- iC880A-SPI concentrator Board
- Ethernet Cable
- Some wires ( female - female )
Software needed :
- Raspbian
( installation instructions : https://www.raspberrypi.org/documentation/installation/installing-images/README.md ).
- PuTTY: a free SSH and Telnet client ( https://www.chiark.greenend.org.uk/~sgtatham/putty/ ).

Circuit schematic :


Steps :
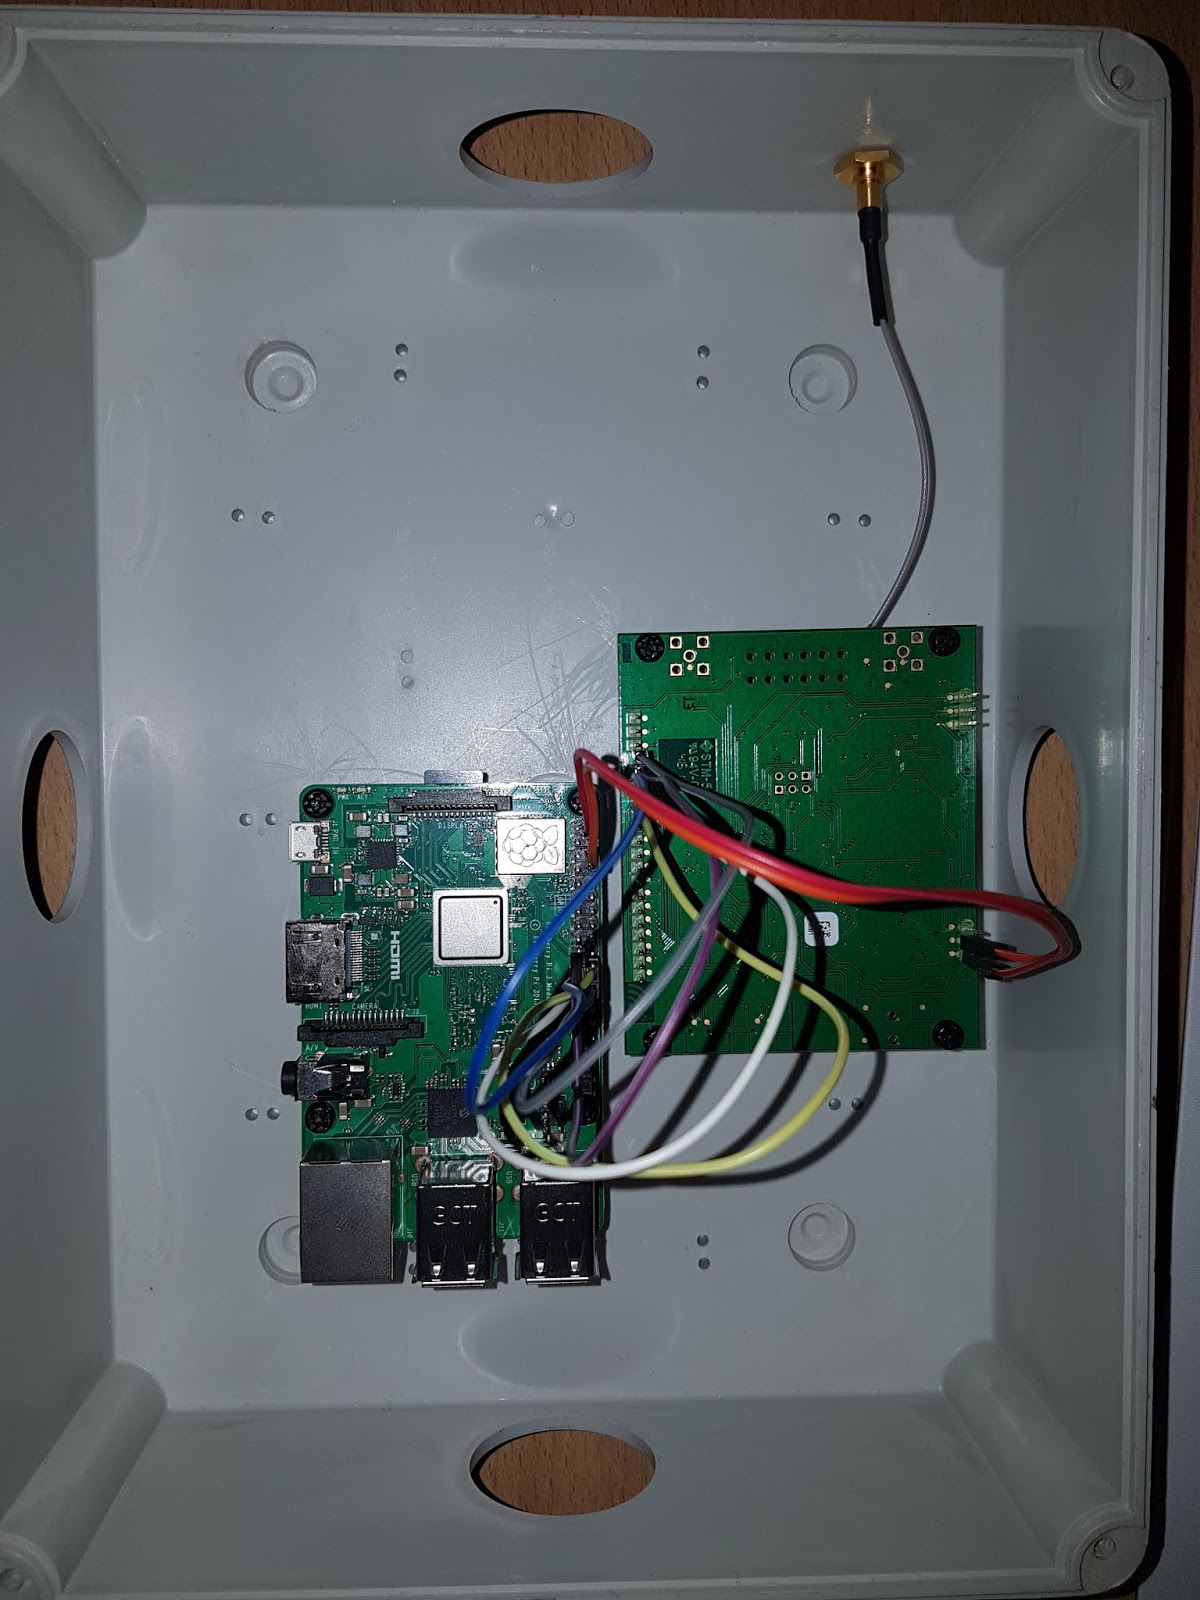
1) Connect the jumper wires between the two boards using the following table ( See the Circuit schematic ).
2) Install the antenna (WARNING: never power up without the antenna !).
3) Install the SD card in the RPi.
4) Connect ethernet cable to RPi.


Enable SPI :
1) Use the command Line sudo raspi-config ( $ sudo raspi-config )
2) Use the down arrow to select 5 Interfacing Options
3) Arrow down to P4 SPI
4) Select Yes when it asks you to enable SPI
5) Also select Yes if it asks about automatically loading the kernel module
6) Reboot (it will ask on exit, but you can do it manually with sudo reboot


Setting up Raspberry's Wi-Fi connection :
- You Can check the Link Below :
( https://www.raspberrypi.org/documentation/configuration/wireless/wireless-cli.md )
update your Operating System ( OS ) :
- Use the command Line Below :
$ sudo apt-get update
install git
- Use the command Line Below :
$ sudo apt-get install git
Create new user for TTN and add it to sudoers (TTN is theThingsNetwork) :
1) Use This Two command Line Below :
$ sudo adduser ttn
$ sudo adduser ttn sudo
- After That You will get a new user Named ttn
2) You need to reboot your Raspberry
3) Login with your ttn user
4) You need to Repeat the step of Setting up Raspberry's Wi-Fi connection with ttn user
Clone Repository:
- Use The Command Line Below :
$ git clone -b spi https://github.com/ttn-zh/ic880a-gateway.git ~/ic880a-gateway
Install Gateway Software:
Now this Step is very important :
1) Use This Two command Line Below :
$ cd ~/ic880a-gateway
$ sudo ./install.sh spi
2) After this Two command we get our Gateway EUI


3) Now we need to copie our Gateway EUI and go to The Link Below :
( https://github.com/ttn-zh/gateway-remote-config )


What is json file ? :
JSON (JavaScript Object Notation) is a lightweight data-interchange format. It is easy for humans to read and write. It is easy for machines to parse and generate. It is based on a subset of the JavaScript Programming Language, Standard ECMA-262 3rd Edition - December 1999. JSON is a text format that is completely language independent but uses conventions that are familiar to programmers of the C-family of languages, including C, C++, C#, Java, JavaScript, Perl, Python, and many others. These properties make JSON an ideal data-interchange language.
6) You need to copy the Gateway EUI and Paste in Name your file and finished with extension .json
( see the Picture Below ) :

7) in Edit new file You Need to Paste The Code Below But you need to Change some Things and finally Approved Your File :
- gateway_ID // Your Gateway EUI
- ref_latitude // https://www.coordonnees-gps.fr/ ( Use it )
- ref_longitude // https://www.coordonnees-gps.fr/ ( Use it )
- ref_altitude // https://www.coordonnees-gps.fr/ ( Use it )
- contact_email
- description

The Code :
{
"gateway_conf": {
"gateway_ID": "00029BFFFEA1A57A",
"servers": [
{
"server_address": "router.eu.thethings.network",
"serv_port_up": 1700,
"serv_port_down": 1700,
"serv_enabled": true
}
],
"ref_latitude": 50.0822850,
"ref_longitude": 14.4502592,
"ref_altitude": 40,
"contact_email": "malina@vanco.cz",
"description": "TTN Prague VanCo.cz"
}
}
8) Now you need to wait Gonzalo Casas To verify Your File.json it take Little time


Checking connection to TTN:
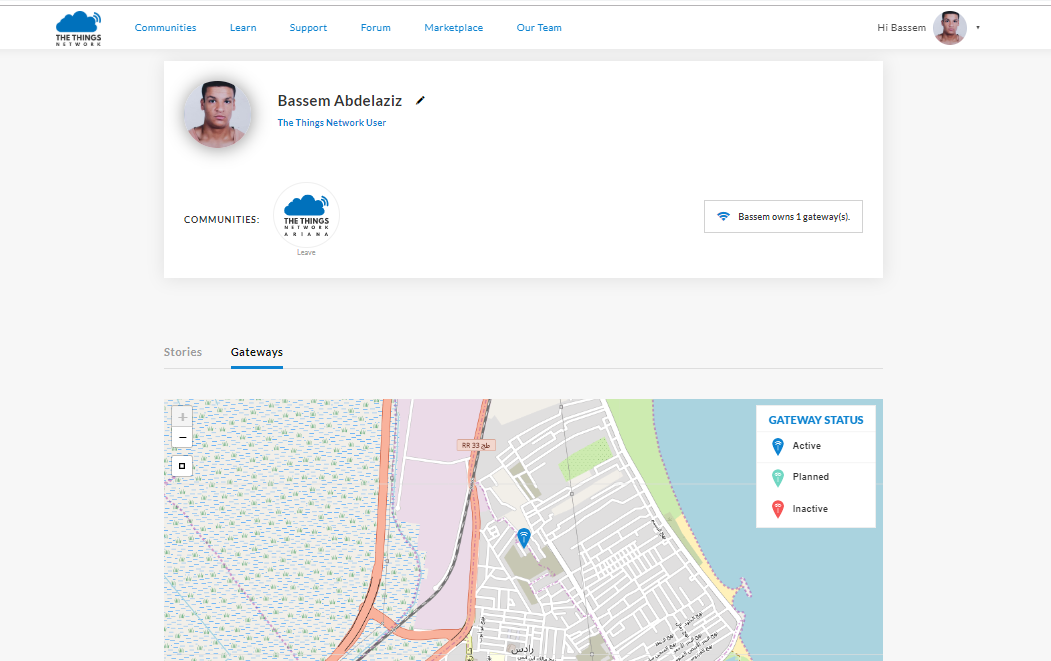
1) Now You need to create an account in TheThingsNetwork See the Link Below :
2) After you create it, Login to your account
3) go to Console ( see the picture Below ) :

4) Choose Gateway then Choose Register Gateway ( see the picture Below ) :


1) Enable checkbox I'm using the legacy packet forwarder
2) Enter your Gateway EUI (if is printed on start and end of the installer)
3) Enter any description
4) Select Europe 868Mhz as frequency plan
5) Don't forget to write your position coordinates
6) Select the correct antenna placement according to your plans
7) Confirm clicking Register gateway

**Finally**
Now you can see the status (which at this point should be connected if we did everything right) and traffic of your gateway!


Our Gateway we will Work 24H/24H So we need a good cooling system to cool our Gateway and Reduce Temperature of RPI's CPU the cooler is very important to Get Best Performance and Stability , So i bought a cooler system it can be useful with some heat sink .


This is my first Article if you have any question please contact me and i will Help you as soon as possible and thank you